Thursday, March 22, 2012

DIY applique

I think I've adequately explained my love of Ohio University to you guys in the past.  But, in case you forgot, you can read about it here.   Over the past week, something magnificent has happened.  The basketball team went to the NCAA tournament.  And won a game!  Then, they won ANOTHER game!  That means they are in the sweet 16, which hasn't happened in a lot of years.  Long before I was even born.  When I was a student at Ohio, the thought of even making it to the tournament was ridiculous, let alone winning a game or two.  When there was about a minute left in the game on Sunday, I turned to Eric and said "If we win this, I'm SO making shirts!"  (Isn't he lucky to have me?  And he definitely did NOT roll his eyes when I said that.)  Well, we won.  So I made shirts.

I love that distressed applique look, so that's what I went for with these.  This was the first time I've done anything like this.  In fact, I'm not even sure applique is the right word.  I sewed fabric onto shirts, whatever that's called.  Here's how I did it.

I started off with some $5 kids shirts from Target. 

They had pockets, so I took those off with a seam ripper. 
I found one of Eric's old polo shirts that was in the giveaway pile.  I liked the green on it, and the stripes were wide enough apart that I could just use the green.  I also had an old ill-fitting white shirt that I used. 
I printed out my letters on cardstock and cut them out.
I cut out the fabric, tracing the printed letters.  This is where one of those cool fabric cutting machines would be handy.  I didn't mind that they weren't perfect though, since I was going for a distressed look.
Then I took some fusible tape and put them on the back of the letters...
And ironed them on a piece of white fabric that I cut out from the old white shirt.  (You could do it right on the garment, but I kind of want to be able to take off the whole patch and put it back onto another shirt when they outgrow these.)  I found that it was really important to fuse the applique on first before sewing it on.  That way it didn't move around while sewing. 
Then I started sewing around the edges of the letters.  (I left a little bit of room away from the edge so that as it gets washed, it will start to look more distressed.) 
Sew really slow.  When you get to a corner or curve put the needle down into the fabric, and lift the presser foot up to release the fabric so you can turn it however you need. 
The cool thing about the word "OHIO" is that all the letters are the same upside down.
Then put some fusing tape or batting on the back of the applique, and iron it on to the shirt where you want it. 
And sew around the whole thing
Then I cut the excess fabric off, and threw it into the washer to start the distressed look. 
I tried taking pictures of the boys in their shirts at the park.  It didn't really work.  I couldn't get the both to look at the camera and make a normal face....
or each other.....
or anything else....
This one cracks me up!
So, I just took them home and got individual pictures of them in their new shirts. 


I made one for me too!  A different one.  I used pretty much the same process, but this time I got a green corduroy from Joann's, and I sewed the Ohio (with a heart cut out where Ohio University is) right onto the shirt. Then washed it too. 
Corduroy frays well.

With the shirt on
Go Bobcats!
Enhanced by Zemanta

Monday, March 12, 2012

Mile High Momday: Fitted Hoodie

I have a confession to make.  I'm a hoarder.  Not like the hoarders you see on tv, but I hoard tshirts and sweatshirts.  I can go through my closet and get rid of tons and tons of clothes, but never a tshirt or sweatshirt.  In my defense, I DO wear them a lot.  But the problem with most of my tees and sweats is that they are about 3 sizes too big for me.  And unless I'm sick and have no plans to leave the house, (like I have been for the past 2 weeks) I don't usually wear them. 

Like this Avalanche hoodie.
 
I got this beauty in the boys department when I was going to my first Avalanche game when I was pregnant with Jackson.  I'm pretty sure no one noticed I was pregnant when I wore this.  It's a size boys XL.  And apparently extra large sized boys have very thick arms and are shaped like boxes.  

We got last minute tickets to the Avalanche game this past Saturday, and I knew I wanted to wear Avalanche gear, but didn't want to look like an extra large boy.  Or pregnant.  So a quick alteration was in order.  

I've done this with a few of my sweat shirts.  Some have gone well.  Some, not so well.  So I'll tell you how I did this one, that went well, and things to avoid along the way.  (So you don't end up with a short sleeved sweatshirt, like I did a couple weeks ago)  This is so not an exact science.  I'm sure any real seamstress would be cringing at the way I've done this, but it works for me.  And it makes an uncute shirt, cute and totally wearable.  So it's a win in my book. 

The whole project took about 45 minutes, but that included stopping several times for motherly duties.  (or maybe I should say "doodies"?  I don't know.)  ANYWAY

First I started with a hoodie that fits me well.
Then I took my Avs hoodie and turned it inside out.
I put my well fitting hoodie over the Avs one...
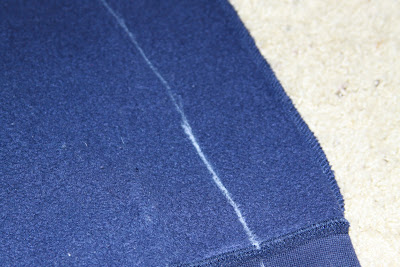
And drew a line around the good hoodie with chalk.  This doesn't have to be an exact science, but I did use my tape measure a couple times in various places to make sure I was staying even on each side. 

A note from experience here.  Be careful around the armpits and arms.  My last hoodie was so tight in the armpits it was way too uncomfortable to wear.  When in doubt, give yourself extra room.  You can always take it in more later. Also, be careful with the wrists.  I barely took mine in at all.  Those are probably close to the right size to begin with. 
Then I pinned the front and back together around the chalk line, to keep it in place while I sewed.  Don't cut anything yet!!!
Take a contrasting color of thread and make an extra long stitch over your chalk line.  This is just to hold it in place so you can try it on, and to give you a guide for when you really take it in later. 

It's tempting to skip this step.  I have.  And I was sorry.  It takes two minutes, just do it. 


Basting stitch over the chalk line
Now try it on, inside out.  

If you turn it right side out, there will be too much material inside and you won't get a good feel for how it fits. 
At this point, the baby woke up and I had to attend to him.  In my inside out basted hoodie.  It was cool though.  I felt like BATMOM!!
If you like the way it fits, go ahead and use a coordinating color thread and  do a tight zig zag stitch over your basting thread. 

If you don't like the way it fits,  make adjustments now.  (I took the arms in a smidge more.  I was a little overly careful about them being too tight.)

After you do your zig zag stitch everywhere, try it on again, inside out.  I know I'm nagging here, but it's not too late to fix it if it doesn't fit right.  It's never too late until you start cutting.

If it works, go ahead and cut off the excess.  Some people might go back through and do a zig zag stitch again on the edge to ensure it's not going anywhere. You can also pull the basting stitch out.  I didn't though.  (And no know knew the difference...)

We had a great time at the hockey game, btw.  We won!  And now Jackson wants to be a professional hockey player when he grows up.  And a professional basketball player.  And soccer player.  And golfer.....